Introduction:
In my previous article I
have explained about Code used to How
to generate random strings/passwords using c#.net. In this article I am going to explain about how to show the
confirmation message while deleting the row from the grid view using c#.net.
Explanation:
For
the explanation purpose I have created table with cities named tempCities and
created two procedures one for inserting and another one for deleting.
Below
is the script used.
CREATE TABLE tempCities(Id int identity,Cityname Varchar(50))
GO
INSERT INTO tempCities VALUES('Chennai')
INSERT INTO tempCities VALUES('Bangalore')
INSERT INTO tempCities VALUES('Delhi')
INSERT INTO tempCities VALUES('Kolkatta')
INSERT INTO tempCities VALUES('Mumbai')
GO
CREATE PROC getTempCities
AS
BEGIN
SET NOCOUNT ON
SELECT Id,Cityname FROM TempCities
SET NOCOUNT OFF
END
GO
CREATE PROC deleteTempCities(@Id
INT)
AS
BEGIN
SET NOCOUNT ON
DELETE FROM
TempCities WHERE ID=@Id
SET NOCOUNT OFF
END
GO
Then I have a grid view control in my page which will show the city details
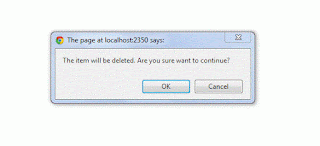
If
you try to delete the row then it will ask for the confirmation like below
Below
is the aspx code used
<form id="form1" runat="server">
<div>
<asp:GridView DataKeyNames="Id" ID="grdResults" runat="server" AutoGenerateColumns="false">
<Columns>
<asp:BoundField DataField="Id" HeaderText="ID" />
<asp:BoundField DataField="Cityname" HeaderText="City Name" />
<asp:TemplateField HeaderText="Action">
<ItemTemplate>
<asp:LinkButton ID="lbDelete" runat="server" OnClick="lbDelete_Click" OnClientClick="return fnConfirm();"> Delete</asp:LinkButton>
</ItemTemplate>
</asp:TemplateField>
</Columns>
</asp:GridView>
</div>
</form>
<script type="text/javascript">
function
fnConfirm() {
if
(confirm("The item will be deleted. Are you
sure want to continue?") == true)
return
true;
else
return
false;
}
</script>
Below
is the aspx.cs code used
using System;
using System.Collections.Generic;
using System.Web;
using System.Web.UI;
using System.Web.UI.WebControls;
using System.Data;
using System.Data.SqlClient;
public partial class
_Default : System.Web.UI.Page
{
string
sqlConnStr = "Data Source=.;Initial
Catalog=mydb;Persist Security Info=True;User ID=sa;password=password;";
protected void Page_Load(object
sender, EventArgs e)
{
if
(!IsPostBack)
{
BindData();
}
}
private void BindData()
{
DataSet
ds = new DataSet();
using (SqlConnection sqlConn = new
SqlConnection(sqlConnStr))
{
using
(SqlCommand sqlCmd = new SqlCommand())
{
sqlCmd.Connection = sqlConn;
sqlCmd.CommandType = CommandType.StoredProcedure;
sqlCmd.CommandText = "getTempCities";
using
(SqlDataAdapter sqlAdp = new SqlDataAdapter(sqlCmd))
{
sqlAdp.Fill(ds);
}
}
}
grdResults.DataSource = ds;
grdResults.DataBind();
}
protected void lbDelete_Click(object
sender, EventArgs e)
{
LinkButton
lnkbtn = sender as LinkButton;
GridViewRow
grdRow = lnkbtn.NamingContainer as GridViewRow;
string
Cityid = grdResults.DataKeys[grdRow.RowIndex].Value.ToString();
using (SqlConnection sqlConn = new
SqlConnection(sqlConnStr))
{
using
(SqlCommand sqlCmd = new SqlCommand())
{
if
(sqlConn.State == ConnectionState.Closed)
sqlConn.Open();
sqlCmd.Connection = sqlConn;
sqlCmd.CommandType = CommandType.StoredProcedure;
sqlCmd.Parameters.AddWithValue("@Id", Cityid);
sqlCmd.CommandText = "deleteTempCities";
sqlCmd.ExecuteNonQuery();
sqlConn.Close();
}
}
BindData();
}
}
Do you like this article? Help us to improve. Please post your comments
below.
Source
Code:


Comments
Post a Comment